7.6. Convolutional Neural Networks (LeNet)
* LeNet
LeNet은 Convolution과 pooling 층을 교대로 사용하여 입력 이미지에서 특징을 추출하고, 마지막에 fully connected layr를 사용하여 최종적으로 클래스를 분류하는 딥러닝 모델
import torch
from torch import nn
from d2l import torch as d2l
7.6.1. LeNet
def init_cnn(module):  #@save
    """Initialize weights for CNNs."""
    if type(module) == nn.Linear or type(module) == nn.Conv2d:
        nn.init.xavier_uniform_(module.weight)

class LeNet(d2l.Classifier):  #@save
    """The LeNet-5 model."""
    def __init__(self, lr=0.1, num_classes=10):
        super().__init__()
        self.save_hyperparameters()
        self.net = nn.Sequential(
            nn.LazyConv2d(6, kernel_size=5, padding=2), nn.Sigmoid(),
            nn.AvgPool2d(kernel_size=2, stride=2),
            nn.LazyConv2d(16, kernel_size=5), nn.Sigmoid(),
            nn.AvgPool2d(kernel_size=2, stride=2),
            nn.Flatten(),
            nn.LazyLinear(120), nn.Sigmoid(),
            nn.LazyLinear(84), nn.Sigmoid(),
            nn.LazyLinear(num_classes))
@d2l.add_to_class(d2l.Classifier) #@save
def layer_summary(self, X_shape):
X = torch.randn(*X_shape)
for layer in self.net:
X = layer(X)
print(layer.__class__.__name__, 'output shape:\t', X.shape)
model = LeNet()
model.layer_summary((1, 1, 28, 28))
7.6.2. Training
trainer = d2l.Trainer(max_epochs=10, num_gpus=1)
data = d2l.FashionMNIST(batch_size=128)
model = LeNet(lr=0.1)
model.apply_init([next(iter(data.get_dataloader(True)))[0]], init_cnn)
trainer.fit(model, data)
1. average pooling 대신 max pooling을, softmax 대신 ReLU 적용
class LeNet(d2l.Classifier):
  def __init__(self, lr=0.1, num_classes=10):
    super().__init__()
    self.save_hyperparameters()
    self.net = nn.Sequential(
        nn.LazyConv2d(6, kernel_size=5, padding=2),
        nn.ReLU(),
        nn.MaxPool2d(kernel_size=2, stride=2),  # Max Pooling으로 변경
        nn.LazyConv2d(16, kernel_size=5),
        nn.ReLU(),
        nn.MaxPool2d(kernel_size=2, stride=2),  # Max Pooling으로 변경
        nn.Flatten(),
        nn.LazyLinear(120),
        nn.ReLU(),  # Softmax 대신 ReLU 사용
        nn.LazyLinear(83),
        nn.ReLU(),  # Softmax 대신 ReLU 사용
        nn.LazyLinear(num_classes)
    )
2.
1) Convolution window size 변경
kernel_size
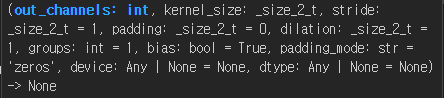
2) the number of output channel 변경
Convolution 레이어의 out_channels 파라미터를 통해 변경
3) the number of convolution layers 변경
모델 정의 부분에서 합성곱 레이어를 수정하여 변경
4) the number of fully connected layers
nn.LazyLinear(), 레이어를 추가하거나 제거하여 변경
5) learning rate 등 training detail 변경
ex: trainer = d2l.Trainer(lr=0.01, max_epochs=20, num_gpus=1)
파라미터를 통해 변경
3.
MNIST 데이터셋: 손글씨 숫자 (0~9) 데이터셋으로, 28x28 크기의 흑백 이미지로 구성되어 있음. 딥러닝 모델을 테스트하고 학습하는 데 자주 사용되는 기본적인 이미지 데이터셋
# MNIST 데이터셋 로드
data = d2l.MNIST(batch_size=128)

# 모델 정의 및 초기화
model = LeNet(lr=0.1)  # 개선된 LeNet 모델
model.apply_init([next(iter(data.get_dataloader(True)))[0]], init_cnn)

# Trainer 설정 및 훈련 시작
trainer = d2l.Trainer(max_epochs=10, num_gpus=1)
trainer.fit(model, data)  # 훈련 실행
4. Displaying activations of the first and second layer
첫번째 두번째 활성화 값을 시각화하는 방법
# 입력 데이터를 LeNet 모델에 통과시키고 각 레이어의 활성화 값 추출
def get_activations(model, layer_num, input_tensor):
    layers = list(model.net.children())  # Sequential 네트워크의 각 레이어 가져오기
    activation = input_tensor
    for i in range(layer_num + 1):  # 지정된 레이어까지 통과
        activation = layers[i](activation)
    return activation

# 가상의 스웨터와 코트 이미지 예시
sweater_image = torch.randn(1, 1, 28, 28)  # 가상 스웨터 이미지
coat_image = torch.randn(1, 1, 28, 28)     # 가상 코트 이미지

# 첫 번째 레이어 활성화
activation_layer1_sweater = get_activations(model, 0, sweater_image)
activation_layer1_coat = get_activations(model, 0, coat_image)

# 두 번째 레이어 활성화
activation_layer2_sweater = get_activations(model, 2, sweater_image)
activation_layer2_coat = get_activations(model, 2, coat_image)

# 활성화 결과 출력
print("첫 번째 레이어 스웨터 이미지 활성화:", activation_layer1_sweater)
print("첫 번째 레이어 코트 이미지 활성화:", activation_layer1_coat)
print("두 번째 레이어 스웨터 이미지 활성화:", activation_layer2_sweater)
print("두 번째 레이어 코트 이미지 활성화:", activation_layer2_coat)
5. 확실하게 다른 이미지를 모델에 입력했을 때 활성화 변화
현재 손글씨 숫자에 대해 훈련되었으므로 다른 데이터를 입력하면 모델이 예상치 못한 특징을 추출하거나 활성화 값이 달라질 수 있음
# 가상의 고양이, 자동차, 잡음 이미지 생성
cat_image = torch.randn(1, 1, 28, 28)   # 고양이 이미지
car_image = torch.randn(1, 1, 28, 28)   # 자동차 이미지
noise_image = torch.randn(1, 1, 28, 28) # 무작위 잡음 이미지

# 첫 번째 레이어에 대한 활성화 값
activation_cat = get_activations(model, 0, cat_image)
activation_car = get_activations(model, 0, car_image)
activation_noise = get_activations(model, 0, noise_image)

# 활성화 결과 출력
print("고양이 이미지 첫 번째 레이어 활성화:", activation_cat)
print("자동차 이미지 첫 번째 레이어 활성화:", activation_car)
print("잡음 이미지 첫 번째 레이어 활성화:", activation_noise)


